Getting Started
The following guide will help you to get started using Connect. Once you have your project ID and API key and you have decided how to model your events, you can start pushing events and executing queries.
Installing the SDK
The simplest way to get started is to install the connect_client Ruby Gem.
Bundler
Add the following line to your Gemfile and run bundle install:
gem "connect_client"
RubyGems
You can also add straight from RubyGems:
gem install connect_client
Initializing the client
Before you can start pushing events, you must initialize the Connect client with your project ID and API key:
require 'connect_client'

ConnectClient.configure do |config|
  config.project_id = 'YOUR_PROJECT_ID'
  config.api_key = 'YOUR_PUSH_KEY'
  config.async = false
end
Whether or not to set async to true or false is detailed in pushing events.
Pushing events
The SDK offers a number of ways to push events to Connect either synchronously or asynchronously.
Pushing events synchronously
The SDK supports synchronously pushing events into collection(s). When performance is important, however, we recommend pushing events asynchronously or pushing events with synchrony.
To push events synchronously, ensure that async is set to false as follows:
require 'connect_client'

ConnectClient.configure do |config|
  config.project_id = 'YOUR_PROJECT_ID'
  config.api_key = 'YOUR_PUSH_KEY'
  config.async = false
end
Single event
To push a single event into a collection, call the push function on ConnectClient and pass in the collection name and a Hash keyed with symbols:
response = ConnectClient.push :my_collection, { :product => "Something", :cost => 2.01 }
Multiple events
To push multiple events into a single collection, call the push function on ConnectClient and pass in the collection name and an array of Hash keyed with symbols:
response = ConnectClient.push(:my_collection, [
  { :name => "Something 1", :cost => 2.01 },
  { :name => "Something 2", :cost => 4.02 }
])
Batches of events
To push multiple events into multiple collections, call the push function on ConnectClient and pass a Hash keyed with collection names:
response = ConnectClient.push({ :my_collection => [
  { :name => "Something 1", :cost => 2.01 },
  { :name => "Something 2", :cost => 4.02 }
], :my_other_collection => [
  { :name => "Something 2", :cost => 2.01 },
  { :name => "Something 3", :cost => 4.02 }
]})
Pushing events asynchronously
The SDK also offers the ability to push events asynchronously by using EventMachine. This is the recommended
way to push events in most apps.
To push events asynchronously, ensure that async is set to true and require eventmachine as follows:
require 'eventmachine'
require 'connect_client'

ConnectClient.configure do |config|
  config.project_id = 'YOUR_PROJECT_ID'
  config.api_key = 'YOUR_PUSH_KEY'
  config.async = true
end
Asynchronous push supports all of the push methods described in pushing events synchronously, but are run using
em-http-request.
Note: The em-http-request gem is not installed as a dependency when installing the connect_client gem because asynchronous push requires
you to "opt in." You must manually install this gem for asynchronous push to function.
To push an event asynchronously you can invoke push using EventMachine.run:
EM.run do
  ConnectClient.push(:my_collection, { :name => "Something", :cost => 2.01 }).response_received { |response|
    puts response
    EM.stop
  }.error_occured { |error|
    puts error
    EM.stop
  }
end
Pushing events with synchrony
The SDK supports asynchronously pushing events into collection(s) with em-synchrony. This allows the code to remain appearing synchronous while
actually running asynchronously.
To push events with synchrony, ensure that async is set to false and require the relevant eventmachine and em-synchrony gems as follows:
require 'eventmachine'
require 'em-synchrony'
require 'em-synchrony/em-http'
require 'connect_client'

ConnectClient.configure do |config|
  config.project_id = 'YOUR_PROJECT_ID'
  config.api_key = 'YOUR_PUSH_KEY'
  config.async = false
end
Asynchronous push with synchrony supports all of the push methods described in pushing events synchronously, but are
run using em-http-request and em-synchrony.
Note: The em-http-request and em-synchrony gems are not installed as a dependency when installing the connect_client gem because
asynchronous push with synchrony requires you to "opt in." You must manually install these gems for this to function.
To push an event asynchronously with synchrony you can invoke push using EM.synchrony:
EM.synchrony do
  response = ConnectClient.push(:my_collection, { :name => "Something", :cost => 2.01 })
  EM.stop
end
Bulk importing events
Currently, this SDK does not support bulk importing events.
However, you can use the HTTP API to run bulk imports if you need.
Restrictions on pushing
There are a number of restrictions on the properties you can use in your events and the limitations on querying which influences how you should structure your events.
Refer to restrictions in the modeling your events section.
Reliability of events
Currently, it is not possible to persist/queue events for delivery in the Ruby SDK. Pushing events either performs a synchronous or asynchronous operation. If that push fails, it is not persisted in a queue of any sort.
We recommend that you consider using a queuing mechanism to ensure reliability of the events if your application relies on the delivery of all events.
Events also allow a custom ID to be sent in the event document which will prevent duplicates (i.e. guarantees idempotence even if the event is delivered multiple times). For example:
myEvent = {
    :name => "Something",
    :id => "12345678",
    :cost => 2.01
}
Timestamps
All events have a single timestamp property which records when the event being pushed occurred. Events cannot
have more than one date/time property. If you feel you need more than one date/time property, you probably need
to reconsider how you're modeling your events.
Querying
You can only run time interval queries or timeframe filters on the
timestampproperty. No other date/time property in an event is supported for querying.
By default, if no timestamp property is sent with the event, the SDK will use the current date and time as
the timestamp of the event.
The timestamp, however, can be overridden to, for example, accommodate historical events or maintain accuracy of event times when events are queued. For example:
myEvent = {
    :name => "Something",
    :timestamp => Time.now.utc,
    :cost => 2.01
}
Timezones
Timestamps are always recorded in UTC. If you supply a timestamp in a timezone other than UTC, it will be converted to UTC. When you query your events, you can specify a timezone so things like time intervals will be returned in local time.
Querying events
Currently, this SDK does not support querying events. However, you have the following options to query:
- HTTP API - send queries and receives results directly via JSON
- JavaScript SDK - query events and build visualizations client-side in the browser
- .NET SDK - query events using the fluent .NET query syntax
We're really looking forward to supporting querying in all SDKs soon!
Exporting events
Currently, this SDK does not support exporting events.
However, you can use HTTP API to perform exports as required.
Deleting collections
Currently, this SDK does not support deleting collections.
However, you can use the one of the following methods to delete collections if required:
Projects and keys
Connect allows you to manage multiple projects under a single account so that you can easily segregate your collections into logical projects.
You could use this to separate analytics for entire projects, or to implement separation between different environments (e.g. My Project (Prod) and My Project (Dev)).
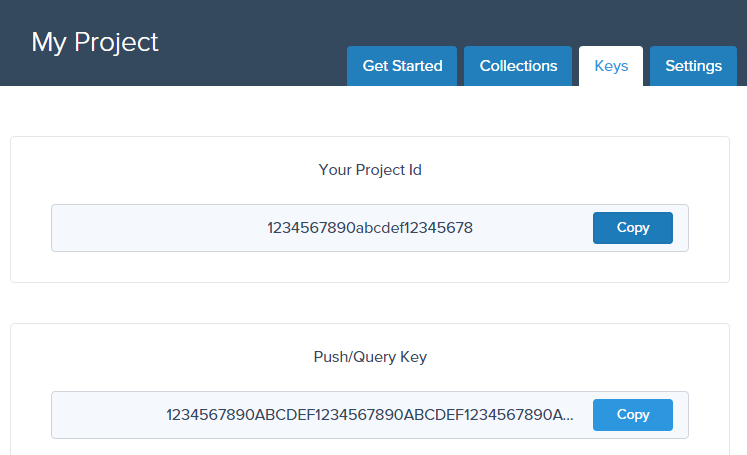
To start pushing and querying your event data, you will need both a project ID and an API key. This information is available to you via the admin console inside each project under the "Keys" tab:
By default, you can choose from four different types of keys, each with their own specific use:
Push/Query Key- you can use this key to both push events and execute queries.
You should only use this key in situations where it is not possible to isolate merely pushing or querying.Push Key- you can only use this key to push events.
You should use this key in your apps where you are tracking event data, but do not require querying.Query Key- you can only use this key to execute queries.
You should use this key in your reporting interfaces where you do not wish to track events.Master Project Key- you can use this key to execute all types of operations on a project, including pushing, querying and deleting collections.
Keep this key safe - it is intended for very limited use and definitely should not be included in your main apps.
You must use your project ID and desired key to begin using Connect:
require 'connect_client'

ConnectClient.configure do |config|
  config.project_id = 'YOUR_PROJECT_ID'
  config.api_key = 'YOUR_API_KEY'
  config.async = false
end
Security
Security is a vital component to the Connect service and we take it very seriously. It is important to consider how to ensure your data remains secure.
API Keys
API keys are the core security mechanisms by which you can push and query your data. It is important to keep these keys safe by controlling where these keys exist and who has access to them.
Each key can either push, query or both. The most important key is the Project Master Key which can perform all of
these actions, as well as administrative functions such as deleting data. Read more about the keys here.
Keeping API Keys Secure
You should carefully consider when and which API keys to expose to users.
Crucially, you should never expose your Project Master Key to users or embed it in client applications.
If this key does get compromised, you can reset it.
If you embed API keys in client applications, you should consider these keys as fully accessible to anyone having access to that client application. This includes both mobile and web applications.
Pushing events securely
While you can use a Push Key to prevent clients from querying events, you cannot restrict the collections or events
clients can push to the API. Unfortunately, this is the nature of tracking events directly client-side and opens the
door to malicious users potentially sending bad data.
In many circumstances, this is not an issue as users can already generate bad data simply by using your application in an incorrect way, generating events with bad or invalid data. In circumstances where you absolutely cannot withstand bad event data, you should consider pushing the events server-side from a service under your control.
Finally, if a Push Key is compromised or being used maliciously, you can always reset it by resetting the master key.
Querying events securely
To query events, you must use an API key that has query permissions. By default, a Query Key has full access to all
events in all collections in your project. If this key is exposed, a client could execute any type of query on your
collections.
You have a number of options on querying events securely:
For internal querying or dashboard, you may consider it acceptable to expose the normal
Query Keyin client applications. Keep in mind that this key can execute any query on any collection in the project.Generate a filtered key, which applies a specific set of filters to all queries executed by clients with the key.
Only allow clients to execute queries via a service you control, which in turn executes queries via the Connect API server-side.
Finally, if a Query Key is compromised or being used maliciously, you can always reset it by resetting the master key.
Resetting the master key
Resetting the Project Master Key will invalidate the previous key and generate a new, random key. This action will also
reset all other keys for the project (including the push, query and any filter keys generated).
Doing this is irreversible and would prevent all applications with existing keys from pushing to or querying the project.
You can only reset the master key in the projects section of the admin console.
Filtered keys
Filtered keys allows you to create an API key that can either push or query, and in the case of querying, apply one or more filters to all queries executed with the key.
This allows you to have finer control over security and what data clients can access, especially in multi-tenant environments.
Filters are only applied to queries
Any filters specified in your filtered key only apply to querying. We currently do not support applying filters to restrict the pushing of events.
Filtered keys can only push or query (as you specify), never administrative functions or deleting data.
Generating a filtered key
Filtered keys are generated and encrypted with the Project Master Key. You do not have to register the
filtered key with the Connect service.
To generate a filtered key, you must supply the master key, key settings and filters. The structure of the filters should match the structure of JSON filters in the HTTP API. For example:
require 'json'
require 'connect_client'

key_definition = {
  :canPush => true,
  :canQuery => true,
  :filters => {
    :"customer.firstName" => {
      :eq => 'Tom'
    }
  }
}

filtered_key = ConnectClient.generate_filtered_key(key_definition.to_json, 'YOUR_MASTER_KEY')

puts filtered_key
| Property | Type | Description |
|---|---|---|
filters |
object |
The filters to apply all queries executed when using the key. These filters should be generated with the same structure as filters from the HTTP API. |
canQuery |
boolean |
Whether or not the key can be used to execute queries. If false, the filters property is ignored (as it does not applying to pushing). |
canPush |
boolean |
Whether or not the key can be used to push events. |
You would use the resulting key to provide to client applications (e.g. in a browser using the JavaScript SDK).
Modeling your events
When using Connect to analyze and visualize your data, it is important to understand how best to model your events. The way you structure your events will directly affect your ability to answer questions with your data. It is therefore important to consider up-front the kind of questions you anticipate answering.
What is an event?
An event is an action that occurs at a specific point in time. To answer "why did this event occur?", our event needs to contain rich details about what the "world" looked like at that point in time.
Put simply, events = action + time + state.
For example, imagine you are writing an exercise activity tracker app. We want to give users of your app the ability to analyze their performance over time. This is an event produced by our hypothetical activity tracker app:
myEvent = {
    :type => "cycling",
    :timestamp => Time.now.utc,
    :duration => 67,
    :distance => 21255,
    :caloriesBurned => 455,
    :maxHeartRate => 182,
    :user => {
        :id => 698396,
        :firstName => "Bruce",
        :lastName => "Jones",
        :age => 35
    }
}
Action
What happened? In the above example, the action is an activity was completed.
In most circumstances, we group all events of the same action into a single collection.
In this case, we could call our collection activityCompleted, or alternatively, just activity.
Time
When did it happen? In the above example, we specified the start time of the activity as the value of the timestamp property. The top-level timestamp property is a special property in Connect. This is because time is an essential property of event data - it's not optional.
When an event is pushed to Connect, the current time is assigned to the timestamp property if no value was provided by you.
State
What do we know about this action? What do we know about the entities associated with this action? What do we know about the "world" at this moment in time? Every property in our event, besides the timestamp and the name of the collection, serves to answer those questions. This is the most important aspect of our event - it's where all the answers live.
The richer the data you provide in your event, the more questions you can answer for your users, therefore it's important to enrich your events with as much information as possible. In stark contrast to the relational model where you would store this related information in separate tables and join at query time, in the event model this data is denormalized into each event, so as to know the state of the "world" at the point in time of the event.
Collections
It is important when modeling your events to consider how you intend to group those events into collections. This is a careful balance between events being broad enough to answer queries for your users, while specific enough to be manageable.
In our activity example, the activity contains different properties based on what the type of activity. Our cycling activity contains properties associated with the bike that was used, while a kayaking activity may contain properties associated with a kayak that is used.
Because a kayaking event may have different properties to a running event, it might seem logical to put each of them in distinct collections. However, if we
had distinct cycling, running and kayaking collections, we would lose the opportunity to query details that are common to all activities.
As a general rule, consider the common action among your events and decide if the specific variants of that action warrant grouping those events together.
Structuring your events
Events have the following core properties:
- Denormalized
- Immutable
- Rich/nested
- Schemaless
It is also important to consider how to group events into collections to enable future queries to be answered.
Events are denormalized
Consider our example event again, notice the age property of the user:
myEvent = {
    :type => "cycling",
    ...
    :user => {
        :id => 698396,
        :firstName => "Bruce",
        :lastName => "Jones",
        :age => 35
    }
}
The user's age is going to be duplicated in every activity he/she completes throughout the year. This may seem inefficient; however, remember that Connect is about analyzing. This denormalization is a real win for analysis; the key is that event data stores state over time, rather than merely current state. This helps us answer questions about why something happened, because we know what the "world" looked like at that point of time.
For example imagine we wanted to chart the average distance cycled per ride, grouped by the age of the rider at the time of the ride. We could simply execute the following query:
var query = connect.query('activity')
  .select({ averageDistance: { avg: 'distance' } })
  .groupBy('user.age');

var chart = connect.chart(query, '#chart', {
    title: 'Average distance per activity by age',
    chart: { type: 'bar' }
});
It's this persistence of state over time that makes event data perfect for analysis.
Events are immutable
By their very nature, events cannot change, as they always record state at the point in time of the event. This is also the reason to record as much rich information about the event and "state of the world" as possible.
For example, in our example event above, while Bruce Jones may now be many years older, at the time he completed his bike ride, he was 35 years of age. By ensuring this event remains immutable, we can correctly analyze bike riding over time by 35-year-olds.
Consider events as recording history - as much as we'd occasionally like to, we can't change history!
Events are rich and nested
Events are rich in that they specify very detailed state. They specify details about the event itself, the entities involved and the state of the "world" at that point in time.
Consider our example activity event - the top level type property describes something about the activity itself (a run, a bike ride, a kayak etc.). The user property specifies rich information about the actor who performed the event. In this case it's the person who completed the activity, complete with their name and age.
In reality, though, we may decide to include a few other nested entities in our event, for example:
myEvent = {
    :type => "cycling",
    ...
    :user => {
        :id => 698396,
        :firstName => "Bruce",
        ...
    },
    :bike => {
        :id => 231806,
        :brand => "Specialized",
        :model => "S-Works Venge"
    },
    :weather => {
        :condition => "Raining",
        :temperature => 21,
        :humidity => 99,
        :wind => 17
    }
}
Note our event now includes details about the bike used and the weather conditions at the time of the activity. By adding this extra bike state information to our event, we have opened up extra possibilities for interrogating our data. For example, we can now query the average distance cycled by each model of bike that was built by "Specialized":
var query = connect.query('activity')
  .select({ averageDistance: { avg: 'distance' } })
  .groupBy('bike.model');
  .filter({
    'bike.brand': 'Specialized'
  });
The weather also provides us with exciting insights - what did the world look like at this point in time? What was the weather like? Storing this data allows us to answer yet more questions. We can test our hypothesis that "older people are less scared of riding in the rain" by simply charting the following query:
var query = connect.query('activity')
  .select({ averageDistance: { avg: 'distance' } })
  .groupBy(['user.age', 'weather.condition']);
As you can see, the richer and more denormalized the event, the more interesting answers can be derived when later querying.
Events are schemaless
Events in Connect should be considered semi-structured - that is, they have an inherent structure, but it is not defined. This means you can, and should, push as much detailed information about an event and the state of the "world" as possible. Moreover, this allows you to improve your schema over time and add extra information about new events as that information becomes available.
Restrictions
While you can post almost any event structure to Connect, there are a few, by-design restrictions.
Property names
You cannot have any property in the root document beginning with "tp_". This is because we prefix our own internal properties with this. Internally, we merge our properties into your events for performance at query time.
The property "_id" is reserved and cannot be pushed.
The properties "id" and "timestamp" have special purposes. These allow consumers to specify a unique ID per event and override the event's timestamp respectively. You cannot use the "id" property in queries. Refer to "reliability of events" and "timestamps" for information.
The length of property names can't exceed 255 characters. If you need property names longer than this, you probably need to reconsider the structure of your event!
Properties cannot include a dot in their names. This is because dots are used in querying to access nested properties. The following is an example of an invalid event property due to a dot in the name:
myEvent = {
    "invalid.property" => "value"
}
Arrays
While you can create events with arrays, it is currently not possible to take advantage of these arrays at query time. Therefore, you should avoid using arrays in your events unless you plan to export the raw events.
Distinct count
Distinct count is currently not supported for querying, therefore you should consider how to structure your event if your application relies on this.